You can install Visual Studio Code on Ubuntu using the official Microsoft APT repository, the sandboxed Flatpak package via Flathub, the Snap package from the Snap Store, or by manually downloading the
 .deb file. Visual Studio Code is a very popular, fast, and powerful code editor made by Microsoft.
It comes with built-in support for JavaScript, TypeScript, and Node.js. It also has a huge library of extensions for other languages like C++, C#, Java, Python, PHP(my favorite language in case you were all wondering!), and Go.
VSCode is usually ranked as the top code editor for developers, VS Code brings powerful tools, such as smart code completion, AI Plugins like Claude Code, Codex(chatgpt), Cursor and plenty free AI plugins as well. It also has Git integration, and advanced troubleshooting, into a highly responsive interface.
This guide provides step-by-step instructions for installing and setting up Visual Studio Code on Ubuntu 26.04, 24.04, and 22.04 LTS. We cover the official Microsoft repository setup, the Snap package method, Flatpak installation, manual .deb file downloads, and clean uninstallation.
If any of these steps fail on your system, please drop a comment below or contact us and we will help you get it resolved.
APT, Snap, & Flatpak Setup Walkthroughs
Configure the ultimate code editor on your system. Learn how to import Microsoft’s GPG keys, manage container permissions, and establish the perfect development environment.
Choosing the correct installation format affects how Visual Studio Code interacts with your system’s development tools. Review the comparison grid below to select the option that best fits your programming workflow.
Video Tutorial
Watch this step-by-step video guide on how to install and configure Visual Studio Code on Ubuntu 26.04.
VS Code Installation Methods Compared
Review the installation choices below to evaluate release updates, containment levels, filesystem access permissions, and IDE integration capabilities.
| Method | Source channel | System Integration | Sandbox isolation | Best For |
|---|---|---|---|---|
| APT Repo (Microsoft) | Official Microsoft Servers | Full terminal and tool access | None (Native system access) | Most users, maximum compatibility. |
| Snap (Snap Store) | Snapcraft Store | Excellent (Uses –classic) | Classic (Unconfined) | Users who prefer silent background auto-updates. |
| Flatpak (Flathub) | Flathub App Store | Limited (requires extra setup for tools) | Strict sandbox restriction | Users who want their apps kept separate from the system. |
| Standalone .deb | Microsoft Download Page | Native | None | Offline installations or specific version pinning. |
Method 1: Install VS Code via the Official Microsoft APT Repository (Recommended)
The best way to install Visual Studio Code is by adding Microsoft’s official APT repository. This method ensures that the editor receives automatic updates directly through your Ubuntu Update Manager. It also provides the editor with complete, unhindered access to your system’s programming tools and terminal.
First, update your package cache and ensure the tools required for downloading remote files and verifying keys are installed:
sudo apt update
sudo apt install software-properties-common apt-transport-https wget gpg -y
To guarantee the authenticity of the packages you are about to download, import the Microsoft GPG key into the modern Ubuntu keyring directory:
wget -qO- https://packages.microsoft.com/keys/microsoft.asc | gpg --dearmor > packages.microsoft.gpg
sudo install -D -o root -g root -m 644 packages.microsoft.gpg /etc/apt/keyrings/packages.microsoft.gpg
rm -f packages.microsoft.gpg
With the security key imported, add the repository URL to your system’s software sources list:
echo "deb [arch=amd64,arm64,armhf signed-by=/etc/apt/keyrings/packages.microsoft.gpg] https://packages.microsoft.com/repos/code stable main" | sudo tee /etc/apt/sources.list.d/vscode.list > /dev/null
Finally, update the package index to reflect the newly added Microsoft repository, and run the install command:
sudo apt update
sudo apt install code -y
Method 2: Install VS Code via the Snap Store
If you prefer an installation method that handles automatic updates silently in the background without modifying your system’s software sources, Snap is an excellent choice. The Snap package for VS Code is officially maintained by Microsoft.
Because code editors must run build scripts, access system files, and interact with programming tools on your hard drive, VS Code cannot operate within a strict sandbox. Therefore, you must use the --classic flag, which grants the app full access to your system.
Open your terminal using the shortcut Ctrl+Alt+T and execute the following command:
sudo snap install code --classic
Method 3: Install VS Code via Flatpak (Flathub)
The Flatpak version of Visual Studio Code is maintained by the community on Flathub. Flatpak enforces a strict sandbox environment, which means the editor does not have direct access to your system’s programming tools like Python or Node by default.
To compile code and use debugging tools when running the Flatpak version, you must often install extra Flatpak-specific extensions or manually adjust permissions. This method is generally recommended only for users who strictly prefer their apps to be isolated from the rest of the system.
If your Ubuntu installation does not have Flatpak support, install it and add the Flathub repository:
sudo apt update && sudo apt install flatpak -y
flatpak remote-add --if-not-exists flathub https://dl.flathub.org/repo/flathub.flatpakrepo
Run the installation command to fetch the application from Flathub:
flatpak install flathub com.visualstudio.code -y
Method 4: Manual .DEB File Installation
If you need to install Visual Studio Code on a computer without an internet connection, or if you prefer to bypass the terminal completely, you can download the standalone .deb package directly from Microsoft.
1. Visit the Official VS Code Download Page.
2. Click the .deb (Debian, Ubuntu) button under the Linux penguin icon.
3. Once the file is downloaded to your ~/Downloads folder, you can right-click the file and select Open with Software Install, or run the following terminal command to install it:
cd ~/Downloads
sudo apt install ./code_*.deb
Note: Installing the .deb file automatically adds the Microsoft APT repository to your system, so future updates will be handled by the Ubuntu Update Manager anyway.
How to Launch Visual Studio Code
Once installed, you can open Visual Studio Code using either the Ubuntu graphical interface or directly from your terminal. Launching from the terminal is especially useful when you want to immediately open a specific project folder.
Click on the Activities or Show Applications button at the bottom of your Ubuntu dock (or press the Super/Windows key). Type “Visual Studio Code” in the search bar, and click the blue ribbon icon to launch the editor.
To open the editor from the terminal, simply type:
code
Pro Tip: To instantly open your current terminal directory inside VS Code, use the dot command:
code .
Essential First Steps: Install Extensions
Out of the box, Visual Studio Code is a basic text editor. To unlock its full potential, you should install extensions for the programming languages and tools you use. You can access the Extensions marketplace by clicking the square blocks icon on the left sidebar, or by pressing Ctrl+Shift+X.
- Python (by Microsoft): Essential for Python developers. Includes code coloring, error checking, and project setup.
- C/C++ (by Microsoft): Adds smart code suggestions and error checking for C and C++ projects.
- Prettier – Code formatter: Automatically formats your code so it stays clean and readable.
- Live Server: Creates a local web server that automatically refreshes your web pages as you save them.
Set VS Code as Your Default Text Editor
If you want Ubuntu to open all text files in Visual Studio Code instead of the default system Text Editor, you can easily set it as the default through your system settings.
1. Open the Ubuntu Settings app.
2. Scroll down the left sidebar and select Default Applications.
3. Find the Text Editor option, click the dropdown menu, and select Visual Studio Code.
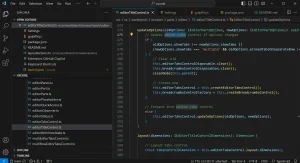
Visual Studio Code Interface Screenshots
Get a glimpse of the Visual Studio Code interface on Ubuntu, featuring the dark theme, integrated terminal, extension marketplace, and project explorer.
-
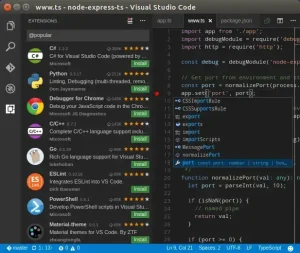
- Screenshot of extensions on ubuntu vscode from How to Install Visual Studio Code on Ubuntu 26.04 – Complete Guide
-
- Vscode screenshot on ubuntu from How to Install Visual Studio Code on Ubuntu 26.04 – Complete Guide
How to Uninstall Visual Studio Code
If you wish to remove VS Code from your system, follow the command that matches the installation method you originally used. Note that these commands remove the editor, but your personal settings and extensions will remain in your home folder.
For APT or .DEB installations:
sudo apt remove code -y
sudo apt autoremove -y

# Optional: Remove the Microsoft repository and key
sudo rm /etc/apt/sources.list.d/vscode.sources
sudo rm /usr/share/keyrings/microsoft.gpg
For Snap installations:
sudo snap remove code
For Flatpak installations:
flatpak uninstall com.visualstudio.code -y
To completely delete your user settings and extensions (Warning: Irreversible):
rm -rf ~/.config/Code
rm -rf ~/.vscode
Frequently Asked Questions
Common questions and troubleshooting tips for Visual Studio Code on Linux.
Is Visual Studio Code available in the default Ubuntu repositories?
No, the official Visual Studio Code package is not present in the default Ubuntu Universe or Main repositories. You must add the official Microsoft APT repository or use the Snap/Flatpak versions.
What is the difference between VS Code and VSCodium?
Visual Studio Code is Microsoft’s official version, which includes some background tracking and specific licensing. VSCodium is a community-made version that removes all tracking while keeping the exact same code editor.
Why does the VS Code Snap package require the –classic flag?
Visual Studio Code requires full access to your system files and programming tools. The --classic flag turns off the strict Snap security isolation, allowing the editor to work properly.
How do I update Visual Studio Code via APT?
If you installed VS Code using the official Microsoft repository (Method 1) or the .deb file (Method 4), it will update automatically alongside your normal system updates when you run sudo apt update && sudo apt upgrade.
More Ubuntu development guides: Best Code Editors · Sublime Text · Android Studio · PowerShell