A “LAMP” stack is a group of open source software that is typically installed together to enable a server to host dynamic websites and web apps. This term is actually an acronym which represents the Linux operating system, with the Apache web server. The site data is stored in a MySQL database, and dynamic content is processed by PHP.
In this quick and easy guide, you will learn how to install and download LAMP on an Ubuntu 14.04 LTS server or desktop environment.
Before you begin, you should first make sure to Install Ubuntu Server on your Ubuntu 14.04 OS. Af
[mwm-aal-display]
Step One — Install Apache
The Apache web server is currently the most popular web server in the world, which makes it a great default choice for hosting a website.
We can install Apache easily using Ubuntu’s package manager, apt. A package manager allows us to install most software pain-free from a repository maintained by Ubuntu. You can learn more about how to use apt here.
For our purposes, we can get started by typing these commands:
- sudo apt-get update
- sudo apt-get install apache2
Since we are using a sudo command, these operations get executed with root privileges. It will ask you for your regular user’s password to verify your intentions.
Afterwards, your web server will be installed.
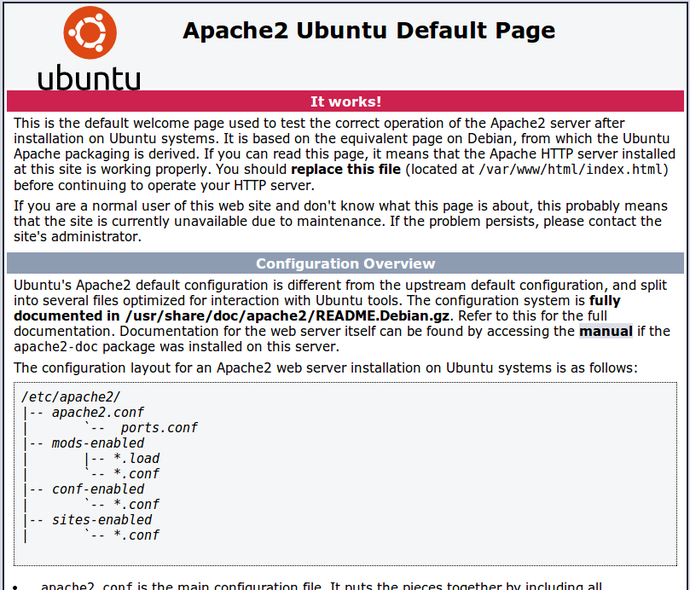
You can do a spot check right away to verify that everything went as planned by visiting your server’s public IP address in your web browser
http://your_server_IP_address
You will see the default Ubuntu 14.04 Apache web page, which is there for informational and testing purposes. It should look something like this…
 Install Apache2 On Ubuntu
Step Two — Install MySQL
Now that we have our web server up and running, it is time to install MySQL. MySQL is a database management system. Basically, it will organize and provide access to databases where our site can store information.
Again, we can use apt to acquire and install our software. This time, we’ll also install some other “helper” packages that will assist us in getting our components to communicate with each other:
sudo apt-get install mysql-server libapache2-mod-auth-mysql php5-mysql
Note: In this case, you do not have to run sudo apt-get update prior to the command. This is because we recently ran it in the commands above to install Apache. The package index on our computer should already be up-to-date.
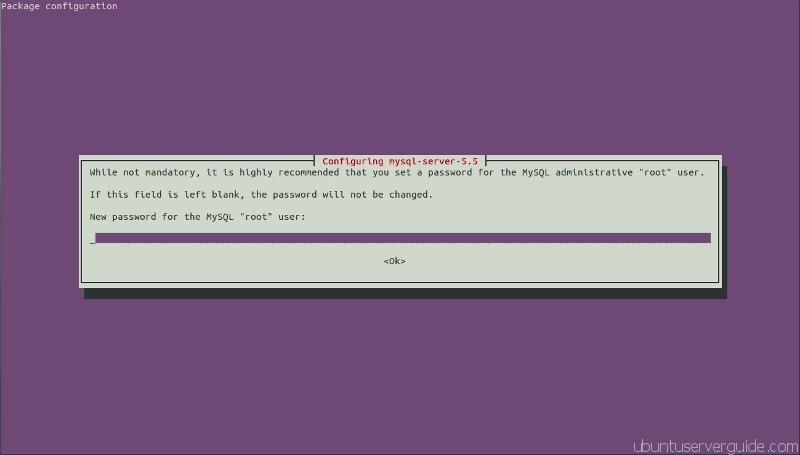
During the installation, your server will ask you to select and confirm a password for the MySQL “root” user. This is an administrative account in MySQL that has increased privileges. Think of it as being similar to the root account for the server itself (the one you are configuring now is a MySQL-specific account however).
When the installation is complete, we need to run some additional commands to get our MySQL environment set up securely.
First, we need to tell MySQL to create its database directory structure where it will store its information. You can do this by typing:
- sudo mysql_install_db
Afterwards, we want to run a simple security script that will remove some dangerous defaults and lock down access to our database system a little bit. Start the interactive script by running:
- sudo mysql_secure_installation
You will be asked to enter the password you set for the MySQL root account. Next, it will ask you if you want to change that password. If you are happy with your current password, type “n” for “no” at the prompt.
For the rest of the questions, you should simply hit the “ENTER” key through each prompt to accept the default values. This will remove some sample users and databases, disable remote root logins, and load these new rules so that MySQL immediately respects the changes we have made.
 Install MySQL 5.5 On Ubuntu
At this point, your database system is now set up and we can move on.
Step Three — Install PHP
PHP is the component of our setup that will process code to display dynamic content. It can run scripts, connect to our MySQL databases to get information, and hand the processed content over to our web server to display.
We can once again leverage the apt system to install our components. We’re going to include some helper packages as well:
- sudo apt-get install php5 libapache2-mod-php5 php5-mcrypt
This should install PHP without any problems. We’ll test this in a moment.
In most cases, we’ll want to modify the way that Apache serves files when a directory is requested. Currently, if a user requests a directory from the server, Apache will first look for a file called index.html. We want to tell our web server to prefer PHP files, so we’ll make Apache look for an index.php file first.
To do this, type this command to open the dir.conf file in a text editor with root privileges:
- sudo nano /etc/apache2/mods-enabled/dir.conf
It will look like this:
<IfModule mod_dir.c>
DirectoryIndex index.html index.cgi index.pl index.php index.xhtml index.htm
</IfModule>
We want to move the PHP index file highlighted above to the first position after the DirectoryIndex specification, like this:
<IfModule mod_dir.c>
DirectoryIndex index.php index.html index.cgi index.pl index.xhtml index.htm
</IfModule>
When you are finished, save and close the file by pressing “CTRL-X”. You’ll have to confirm the save by typing “Y” and then hit “ENTER” to confirm the file save location.
After this, we need to restart the Apache web server in order for our changes to be recognized. You can do this by typing this:
- sudo service apache2 restart
Step Four – Test PHP5 & MySQL
In order to test PHP script you need to create simple PHP script in directory /var/www/html. in this case I’ll create phpinfo.php:
- sudo touch /var/www/html/phpinfo.php
- sudo nano /var/www/html/phpinfo.php
Save and exit ( Ctrl + O, Ctrl + X)
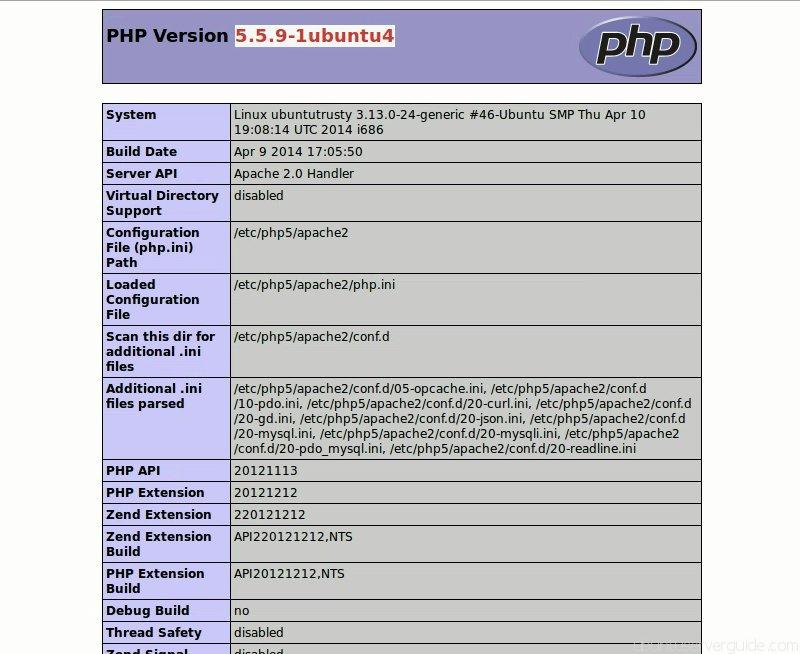
Test the php script you have made from web browser by typing in address bar http://ip_address/phpinfo.php. It will appear like screenshot on below. Just google “phpinfo example page” to produce the following page:
 Install PHP on Ubuntu
This page basically gives you information about your server from the perspective of PHP. It is useful for debugging and to ensure that your settings are being applied correctly.
Testing MySQL connection with PHP script. Create the file /var/www/html/phpmysql.php then add the following line on below. Replace the password with your mysql root password have made during mysql installation:
- sudo touch /var/www/html/phpmysql.php
- sudo nano /var/www/html/phpmysql.php
Test the below code, but before you do, add “<!–?" in front of $con.
<? $con = mysql_connect("localhost","root","password"); if (!$con) { die('Could not connect: ' . mysql_error()); } else { echo "Congrats! connection established successfully"; } mysql_close($con); ?>
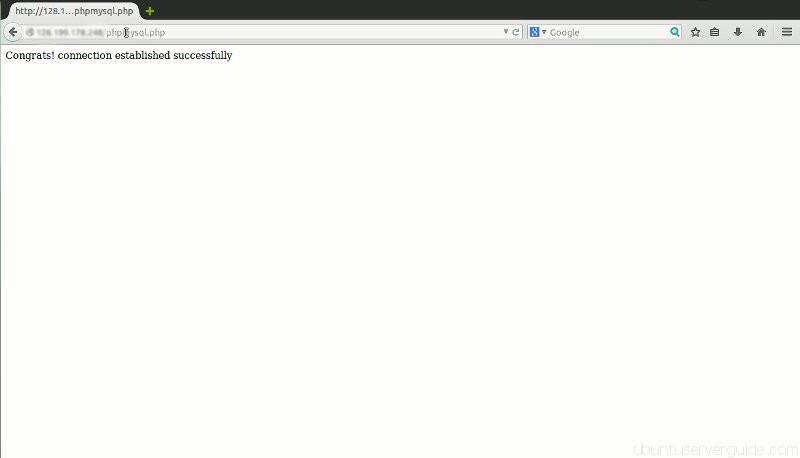
Now open web browser and navigate to http://ip_address/phpmysql.php, The page should like the screenshot below:
 Testing PHP and MySQL on Ubuntu
At this point you are pretty much finished with the installation, you can begin testing out some webpages, scripts etc. Enjoy!
Link References: DigitalOcean LAMP Tutorial | UbuntuServerGuide LAMP Tutorial
More Ubuntu Tutorials to enjoy: How To Share Ubuntu Files With Windows | How To Install Steam On Ubuntu


